Using Easy GIS .NET in your own WinForms Desktop Applications
While Easy GIS .NET Desktop Edition is a powerful GIS application on its own, its true power lies in the componentized design and ease by which developers can add the Easy GIS .NET controls to their own Windows desktop applications.
This page offers links to various examples of how you can use Easy GIS .NET Desktop Edition in your own .NET Windows applications, as well as instructions on how to add a reference to the Easy GIS .NET ShapeFile control to your Visual Studio projects.
Easy GIS .NET is written in C# using .NET Framework 4.7. In order to use the libraries in your own projects you will need to have version 4.7 or later of the .NET framework installed. All of the examples available to download include Visual Studio 2017 solutions. The examples will also run in later versions of Visual Studio.
To view and download example code click on the links to the left.
Including a reference to the Easy GIS .NET class libraries in your own projects
To add a reference to the Easy GIS .NET class libraries in your own projects perform the following steps.
- Start Visual Studio and create a new Windows Application project.
- Download the EGIS Desktop Edition and unzip the contents to a folder in your project.
- Right-click on the project's References and click on "Add Reference..". See Figure 1.
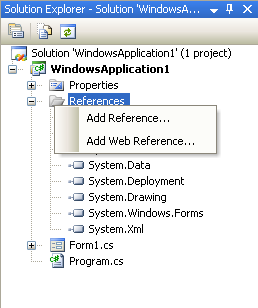
Figure 1 - Click the Browse tab and select EGIS.Controls.dll, EGIS.ShapeFileLib.dll and EGIS.Projections.dll. See Figure 2.
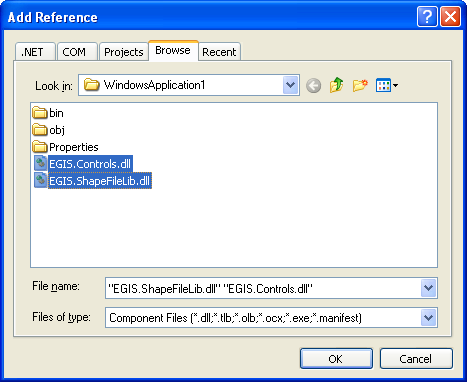
Figure 2
Adding the Easy GIS .NET ShapeFile Control to the Visual Studio Design Toolbox
To add the Easy GIS .NET Controls to the Design Toolbox perform the following steps.
- Right-click on the designer Toolbox and select "Choose Items.." as shown in Figure 3.
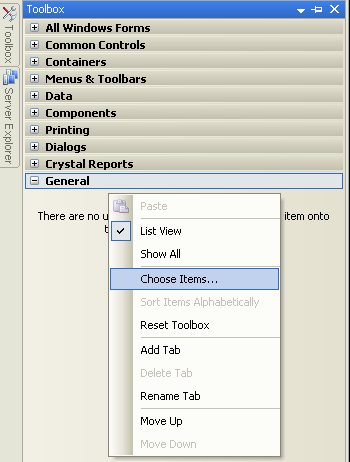
Figure 3 - When the Choose Toolbox Items dialog opens click on Browse and navigate to the location of the EGIS.Controls.dll class library you added to your project.
- Select the SFMap and ShapeFileListControl controls as shown in Figure 4 and click OK.
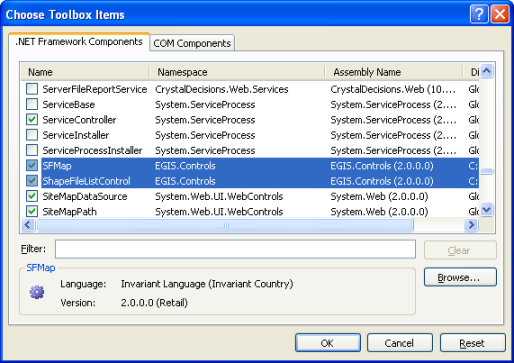
Figure 4 - You should now be able to drag the Easy GIS .NET controls from the Toolbox onto your Windows Forms. See Example 1 for example code on using the SFMap control to display a shapefile in a Windows Application.
Adding Easy GIS .NET Native Proj DLLs to you Project
Easy GIS .NET uses Proj 9.0 to support Coordinate Reference Systems and projections. Proj 9.0 includes a small SQL Lite database file and native DLLs which must be included with your .NET application. These can be copied to your project's output bin directory, but it is better to include these files in your .NET project so they will be copied automatically when your project is built.
- Right-click on your project and click "Add -> Existing Item"
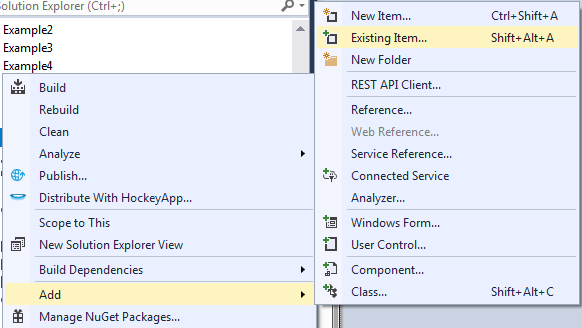
Figure 5 - Change the file type to "All Files (*.*)" and browse to the folder containing the EGIS Desktop Edition files.
Select geomutil_lib.dll and geomutil_libx64.dll and click "Add as Link" as show in Figure 6.
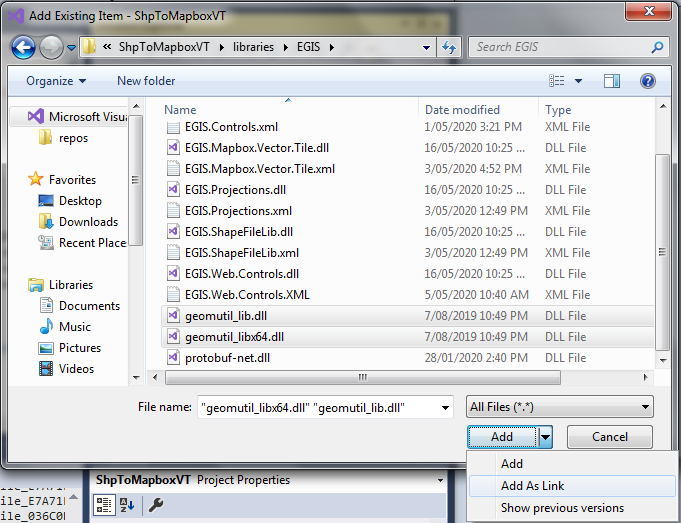
Figure 6 - Select the two files in the Solution Explorer and change the Build Action to "content" and change Copy to Ouput Directory to "Copy if newer" or "copy always"
as show in Figure 7.
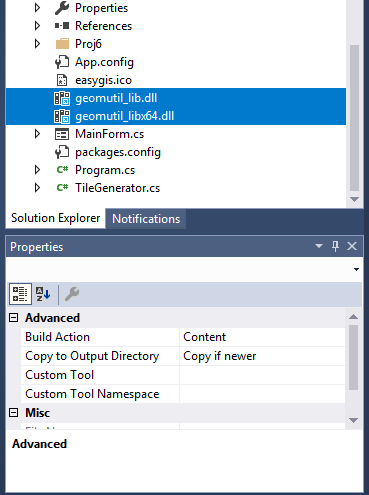
Figure 7 - Create the Proj directory structure shown in Figure 8 (Use Add -> New Folder and rename).
Add the proj.db, proj_9_0.dll and sqlite3.dll files to the folders by using Add->Existing item and "Add as Link".
Be sure to add the correct x86/x64 files from the folder containing the EGIS Desktop Edition Proj folders
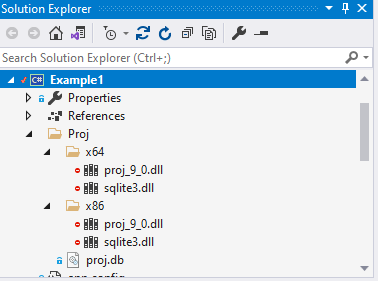
Figure 8 - Change the Build Action to "content" and Copy to Ouput Directory to "Copy if newer" for the files
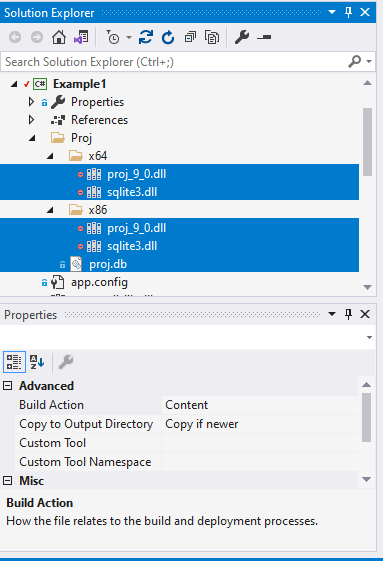
Figure 9